Beautiful and fluid UIs which maintain 60 frames per second are a subtle mark of an excellent app experience. Given how hard it is to avoid jank, developers often choose to simplify designs or forego animations altogether. With Flutter, attention to these details comes as a natural byproduct of its cross-platform rendering engine and its emphasis on declarative UI. In this article, we’ll iterate on a series of examples to illustrate the basics of Flutter animation.
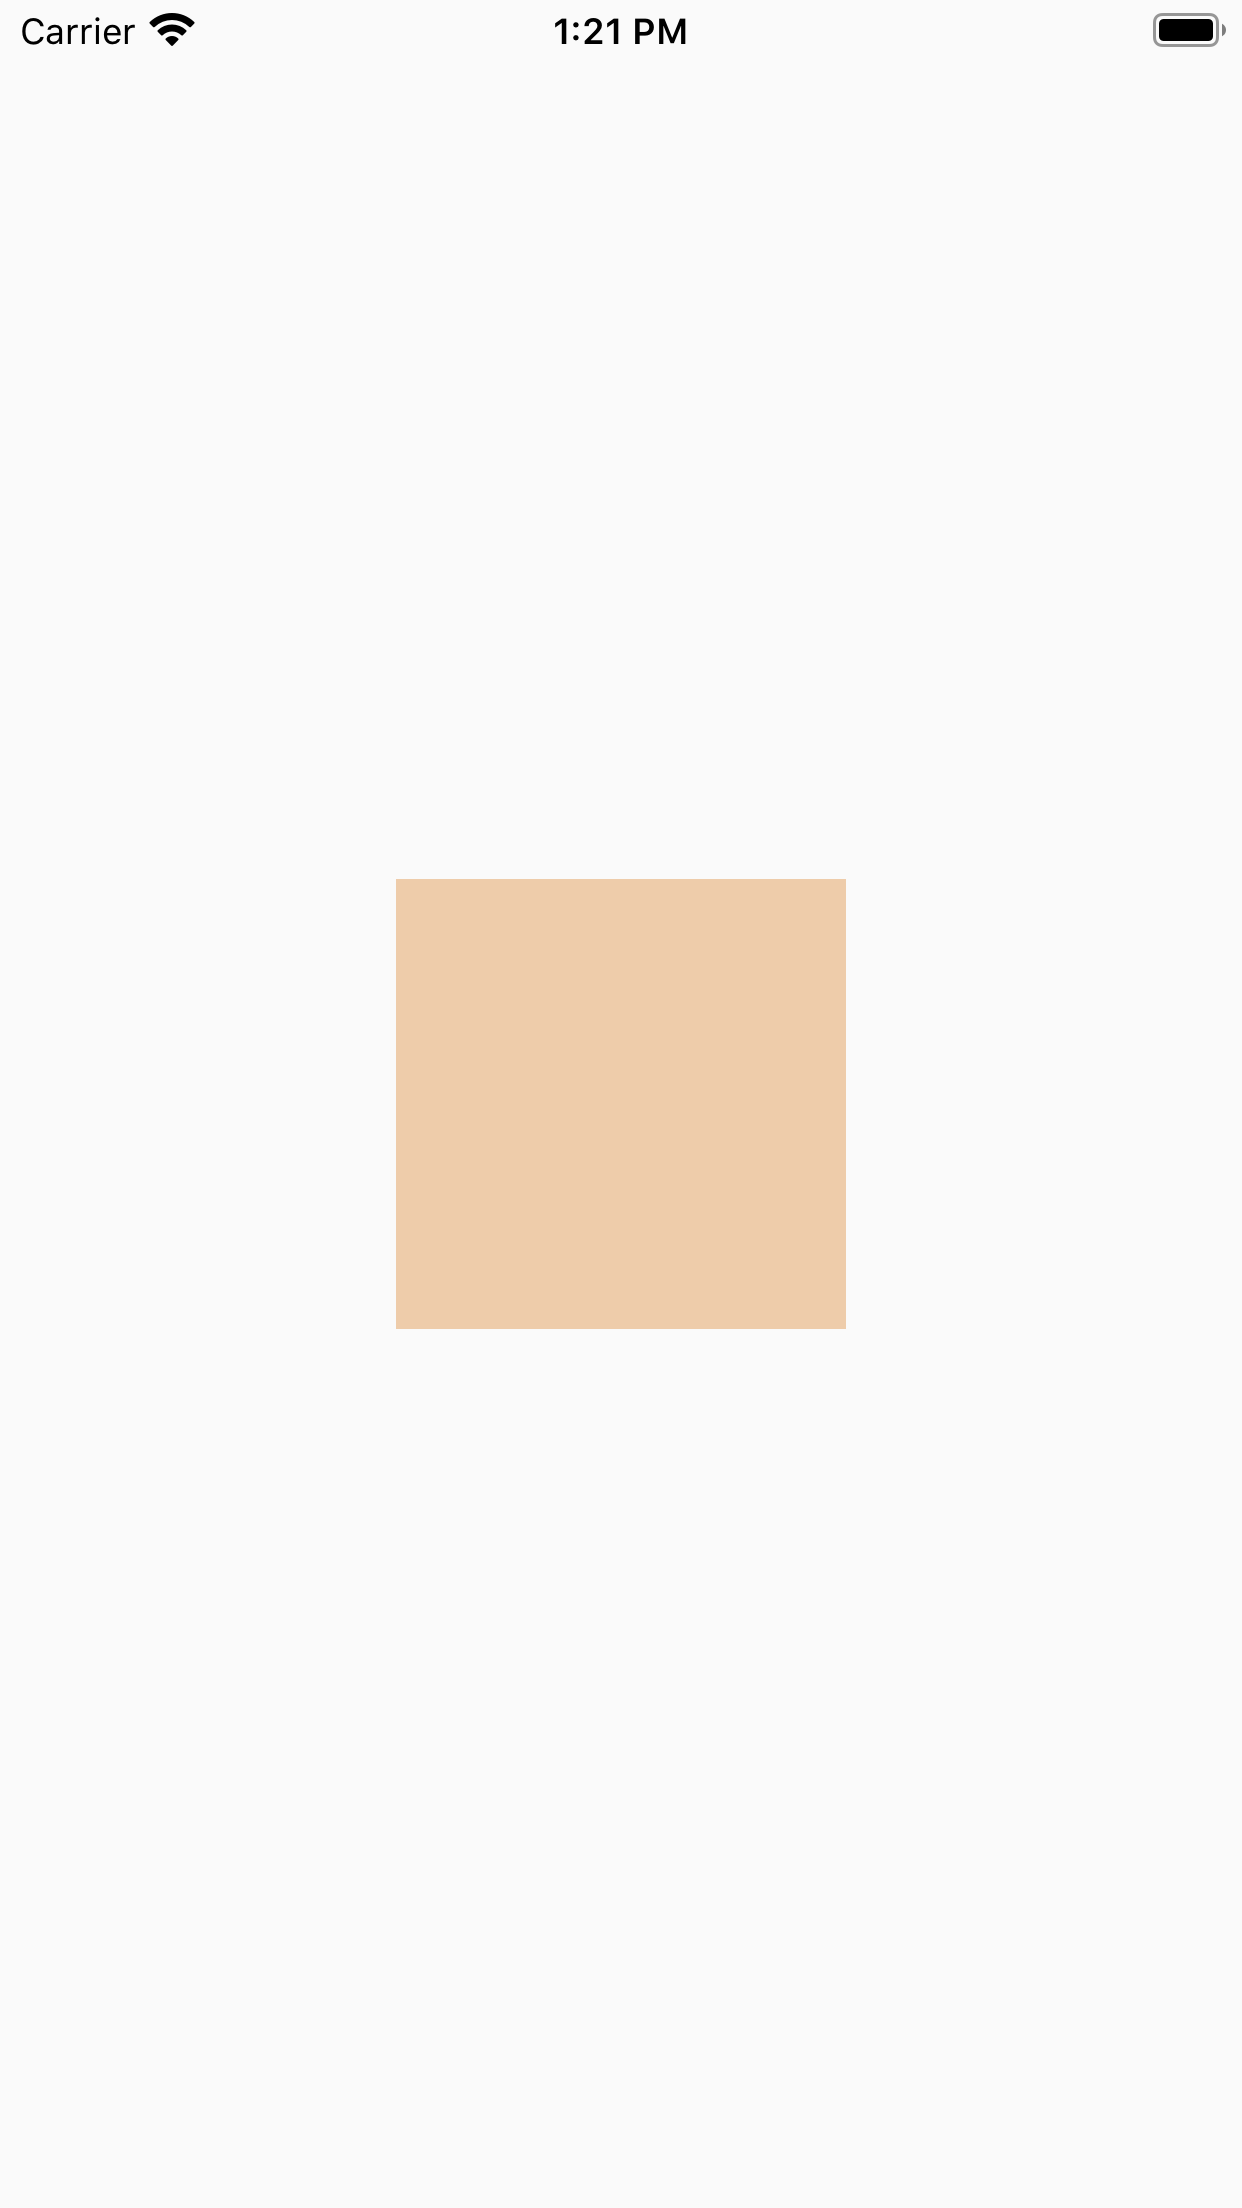
Let’s start with a very basic widget tree that shows an orange square centered on the screen.
 1
 2
 3
 4
 5
 6
 7
 8
 9
10
11
12
13
14
15
16
17
18
19
20
21
22
23
24
|
import 'package:flutter/material.dart';
void main() => runApp(MyApp());
class MyApp extends StatelessWidget {
  @override
  Widget build(BuildContext context) {
    return MaterialApp(
      home: Scaffold(
        body: SimpleScreen(),
      ),
    );
  }
}
class SimpleScreen extends StatelessWidget {
  @override
  Widget build(BuildContext context) {
    return Center(
      child: Container(
        width: 150,
        height: 150,
        color: Color(0xFFEECCAA),
      ),
    );
  }
}
|
Let’s see if we can animate some properties of this screen. First, we’ll wrap our Container in an Opacity widget. Next, we’ll switch to StatefulWidget and add a field to track our widget’s opacity. Finally, we’ll wrap the whole thing in a GestureDetector and add a setState() call to update the opacity.
 1
 2
 3
 4
 5
 6
 7
 8
 9
10
11
12
13
14
15
16
17
18
19
20
21
22
23
24
25
26
27
28
|
class SimpleOpacityAnimation extends StatefulWidget {
  @override
  _State createState() => _State();
}
class _State extends State<SimpleOpacityAnimation> {
  double opacity = 1.0;
  @override
  Widget build(BuildContext context) {
    return GestureDetector(
      onTap: toggleOpacity,
      child: Center(
        child: Opacity(
          opacity: opacity,
          child: Container(
            width: 150,
            height: 150,
            color: Color(0xFFEECCAA),
          ),
        ),
      ),
    );
  }
  toggleOpacity() {
    setState(() {
      opacity = opacity == 0.0 ? 1.0 : 0.0;
    });
  }
}
|
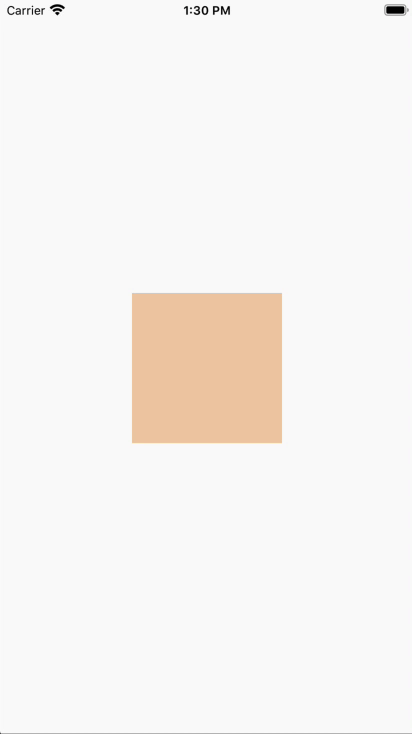
Although our screen is reacting to our changes, this isn’t exactly what we’re looking for. Let’s make some changes to effect a smoothly animated change in opacity. We’ll swap our Opacity widget for an AnimatedOpacity widget, which takes an additional parameter called duration.
1
2
3
4
5
6
7
8
9
|
AnimatedOpacity(
  duration: const Duration(milliseconds: 500),
  opacity: opacity,
  child: Container(
    width: 150,
    height: 150,
    color: Color(0xFFEECCAA),
  ),
)
|

AnimatedOpacity belongs to a whole family of Flutter widgets which make it incredibly simple to animate various properties of a container. Its siblings include other widgets like AnimatedPadding, AnimatedSize, AnimatedPosition, and AnimatedContainer.
More Complex Animations
After seeing how easy it is to start animating our screen, let’s introduce some new tools which will provide us with finer-grained control and the ability to orchestrate multiple components together.
SingleTickerProviderStateMixin is a mixin we can add to our StatelessWidget which will give us access to a Ticker. Ticker is a class that fires a callback once per animation frame.AnimationController is a class that allows us to control animations via methods like forward(), reverse(), and isAnimating. We’ll see more of that later.- An
Animation exposes the value of being animated (such as opacity in the example above) to a widget.
AnimatedBuilder is a widget that builds its child based on an animation. We create it by passing it the animation and a builder function, which is called once per animation frame.
It’s easier to see how these components interact when we look at a simple boilerplate setup.
 1
 2
 3
 4
 5
 6
 7
 8
 9
10
11
12
13
14
15
16
17
18
19
20
21
22
23
24
25
26
27
28
29
30
31
32
33
34
35
|
class MoreComplexAnimation extends StatefulWidget {
  @override
  _MoreComplexAnimationState createState() => _MoreComplexAnimationState();
}
class _MoreComplexAnimationState extends State<MoreComplexAnimation> with SingleTickerProviderStateMixin {
  AnimationController controller;
  Animation animation;
  @override
  void initState() {
    super.initState();
    controller = AnimationController(
      vsync: this,
      duration: const Duration(milliseconds: 500),
    );
    animation = Tween(
      begin: 0.0,
      end: 1.0,
    ).animate(controller);
  }
  @override
  void dispose() {
    super.dispose();
    controller.dispose();
  }
  @override
  Widget build(BuildContext context) {
    return AnimatedBuilder(
      animation: animation,
      builder: (BuildContext context, Widget child) {
        // widget tree to animate
        return null;
      },
    );
  }
}
|
A few things to note:
AnimationControllers need to be disposed to detach the animation callbacks when the StatefulWidget goes out of scope.Tween is a class that allows us to specify the values to animate over (in this case our animation runs from 0.0 to 1.0 ), and is used with the AnimationController to create an Animation.
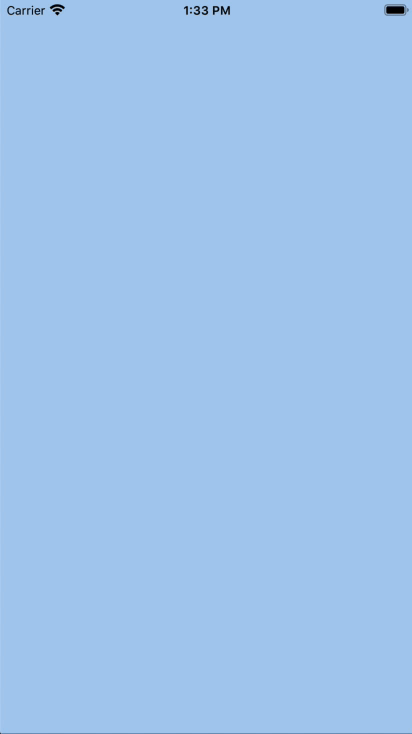
Let’s use our new tools to create an animated bottom sheet. Our outer widget will be a Stack to enable our bottom sheet to slide over our main content. Our main content will fill the screen, while our bottom sheet’s height will animate between 0.0 (fully closed) and screen height / 2 (fully open). We will use a LayoutBuilder to access the constraints of the screen. To open the bottom sheet, we’ll call controller.forward() from a GestureDetector at the top of our widget tree.
 1
 2
 3
 4
 5
 6
 7
 8
 9
10
11
12
13
14
15
16
17
18
19
20
21
22
23
24
25
26
27
28
29
30
31
32
33
34
35
36
37
38
39
40
41
42
43
44
45
46
47
48
49
50
51
52
53
54
55
56
57
58
59
60
|
class MoreComplexAnimation extends StatefulWidget {
  @override
  _MoreComplexAnimationState createState() => _MoreComplexAnimationState();
}
class _MoreComplexAnimationState extends State<MoreComplexAnimation> with SingleTickerProviderStateMixin {
  AnimationController controller;
  Animation heightAnimation;
  @override
  void initState() {
    super.initState();
    controller = AnimationController(
      vsync: this,
      duration: const Duration(milliseconds: 500),
    );
    heightAnimation = Tween(
      begin: 0.0,
      end: 1.0,
    ).animate(controller);
  }
  @override
  void dispose() {
    super.dispose();
    controller.dispose();
  }
  @override
  Widget build(BuildContext context) {
    return GestureDetector(
      onTap: _toggleBottomSheet,
      child: LayoutBuilder(
        builder: (context, constraints) => AnimatedBuilder(
          animation: controller,
          builder: (context, child) => Stack(
            alignment: Alignment.bottomCenter,
            children: <Widget>[
              Container(
                color: Color(0xFFAACCEE),
              ),
              Container(
                height: _bottomSheetHeight(constraints),
                color: Color(0xFFEECCAA),
              ),
            ],
          ),
        ),
      ),
    );
  }
  _bottomSheetHeight(BoxConstraints constraints) {
    return constraints.maxHeight / 2 * heightAnimation.value;
  }
  _toggleBottomSheet() {
    if (!controller.isAnimating) {
      if (controller.isDismissed) {
        controller.forward();
      } else {
        controller.reverse();
      }
    }
  }
}
|
Orchestrating Multiple Animations
The last aspect of Flutter animation we’ll look at is orchestrating multiple animations. Let’s add a fancy label to animate in after the bottom sheet is fully opened.
To accomplish this, we’ll focus most of our attention on the Animation class. Previously we saw that an Animation can be built from a Tween and an AnimationController. However, they can also be built using other animations! The animations that we’ve seen so far are linear animations — that is, the value changes linearly with respect to the duration of the animation. CurvedAnimation gives us the ability to describe many other animation functions using a Curve (there are lots of built-in curves like ease, decelerate, and bounceInOut).
Here’s an example:
1
2
3
4
5
6
7
8
9
|
heightAnimation = Tween(
  begin: 0.0,
  end: 1.0,
).animate(
  CurvedAnimation(
    parent: controller,
    curve: Curves.easeInOut,
  ),
);
|
In order to orchestrate our bottom sheet animation with our label animation, we’ll use another type of curve called Interval. This curve condenses tween values to a subset of the overall duration, allowing us to run staggered animations one-after-another from the same controller. Let’s wrap our curve in an Interval which runs during the first half of the overall duration:
 1
 2
 3
 4
 5
 6
 7
 8
 9
10
11
12
13
|
heightAnimation = Tween(
  begin: 0.0,
  end: 1.0,
).animate(
  CurvedAnimation(
    parent: controller,
    curve: Interval(
      0.0,
      0.5,
      curve: Curves.easeInOut,
    ),
  ),
);
|
Next we’ll create another animation to handle the label’s opacity:
 1
 2
 3
 4
 5
 6
 7
 8
 9
10
11
12
13
|
opacityAnimation = Tween(
  begin: 0.0,
  end: 1.0,
).animate(
  CurvedAnimation(
    parent: controller,
    curve: Interval(
      0.6,
      1.0,
      curve: Curves.slowMiddle,
    ),
  ),
);
|
Here’s our final product:
 1
 2
 3
 4
 5
 6
 7
 8
 9
10
11
12
13
14
15
16
17
18
19
20
21
22
23
24
25
26
27
28
29
30
31
32
33
34
35
36
37
38
39
40
41
42
43
44
45
46
47
48
49
50
51
52
53
54
55
56
57
58
59
60
61
62
63
64
65
66
67
68
69
70
71
72
73
74
75
76
77
78
79
80
81
82
83
84
85
86
87
88
89
90
91
|
class StaggeredAnimation extends StatefulWidget {
  @override
  _StaggeredAnimationState createState() => _StaggeredAnimationState();
}
class _StaggeredAnimationState extends State<StaggeredAnimation> with SingleTickerProviderStateMixin {
  AnimationController controller;
  Animation heightAnimation;
  Animation opacityAnimation;
  @override
  void initState() {
    super.initState();
    controller = AnimationController(
      vsync: this,
      duration: const Duration(milliseconds: 500),
    );
    heightAnimation = Tween(
      begin: 0.0,
      end: 1.0,
    ).animate(
      CurvedAnimation(
        parent: controller,
        curve: Interval(
          0.0,
          0.5,
          curve: Curves.easeInOut,
        ),
      ),
    );
    opacityAnimation = Tween(
      begin: 0.0,
      end: 1.0,
    ).animate(
      CurvedAnimation(
        parent: controller,
        curve: Interval(
          0.6,
          1.0,
          curve: Curves.slowMiddle,
        ),
      ),
    );
  }
  @override
  void dispose() {
    super.dispose();
    controller.dispose();
  }
  @override
  Widget build(BuildContext context) {
    return GestureDetector(
      onTap: _toggleBottomSheet,
      child: LayoutBuilder(
        builder: (context, constraints) => AnimatedBuilder(
          animation: controller,
          builder: (context, child) => Stack(
            alignment: Alignment.bottomCenter,
            children: <Widget>[
              Container(
                color: Color(0xFFAACCEE),
              ),
              Container(
                alignment: Alignment.center,
                height: _bottomSheetHeight(constraints),
                color: Color(0xFFEECCAA),
                child: Opacity(
                  opacity: _labelOpacity(),
                  child: Text("hello flutter animations!"),
                ),
              ),
            ],
          ),
        ),
      ),
    );
  }
  _bottomSheetHeight(BoxConstraints constraints) {
    return constraints.maxHeight / 2 * heightAnimation.value;
  }
  _labelOpacity() {
    return opacityAnimation.value;
  }
  _toggleBottomSheet() {
    if (!controller.isAnimating) {
      if (controller.isDismissed) {
        controller.forward();
      } else {
        controller.reverse();
      }
    }
  }
}
|

If you’re interested in seeing what else we’re doing with Flutter at Atomic Robot, come take a look!